
How to Connect a Custom Domain to Systeme.io
How to Connect a Custom Domain to Systeme.io
Connecting your custom domain to Systeme.io elevates your brand’s professionalism. In this step-by-step guide, you’ll learn exactly how to set up your custom domain seamlessly. Let’s dive right in.
Step 1:Get Your Domain Name Ready
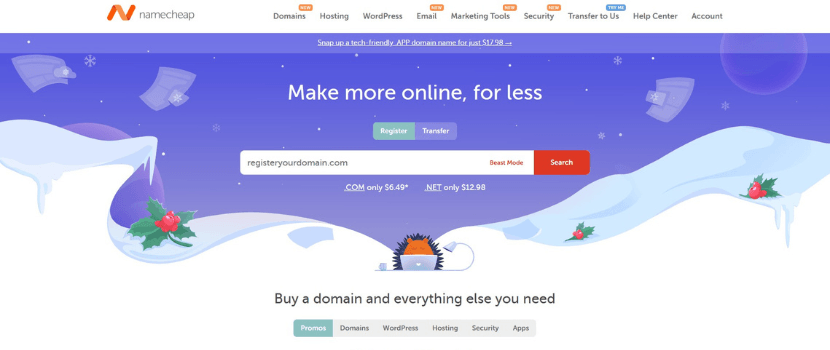
Action: Purchase a domain name from a registrar like Namecheap, GoDaddy, or Google Domains. Why: A custom domain adds credibility to your funnels and emails. Tip: Choose a name that’s easy to spell and remember. Avoid special characters or overly long domain names.
Register a Domain
Step 2:Open Systeme.io Domain Settings
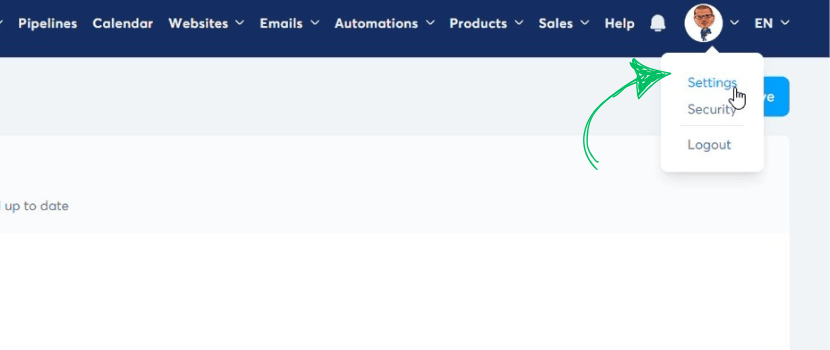
Action: Log in to Systeme.io and navigate to the "Settings" menu located in the dropdown under your avatar.
Click Settings
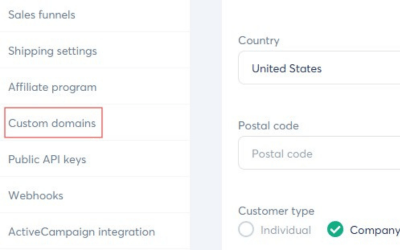
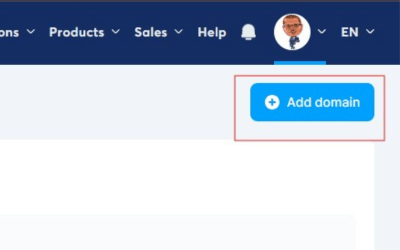
Next, click "Custom Domain" in the left-side navigation, then click "Add Domain" at the top right of the screen.
Click Custom Domains & Add Domain
Step 3:Add Your Custom Domain
Action: After clicking the "Add Domain" button, a popup window will appear. Enter your domain name (e.g., www.yourdomain.com) and click "Save."
Why: This allows Systeme.io to recognize and use your domain.
Add Your Domain Name
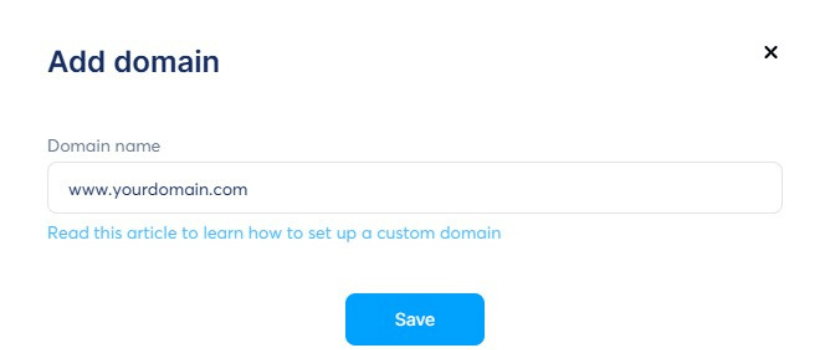
Then: A window displaying your CNAME information will appear. Keep this window open, and open a new tab to navigate to your domain registrar.
Next: After logging in to your domain registrar, navigate to the advanced DNS settings section.
Go to Advanced DNS Section
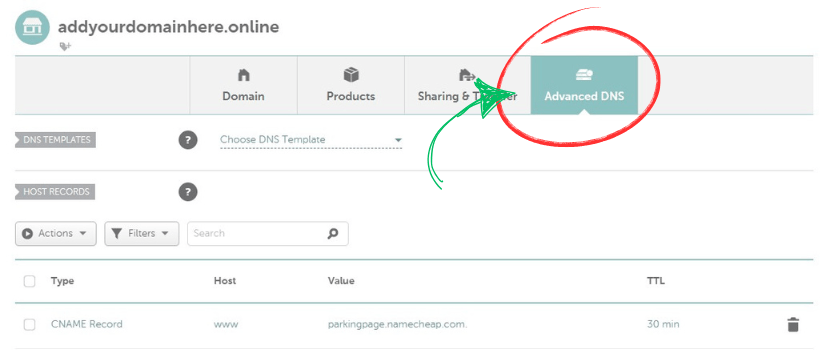
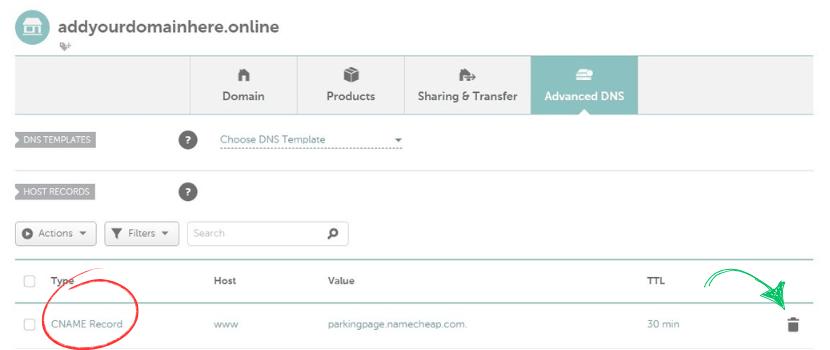
Delete: Any default records that might already exsist.
Delete Any CNAME Already There
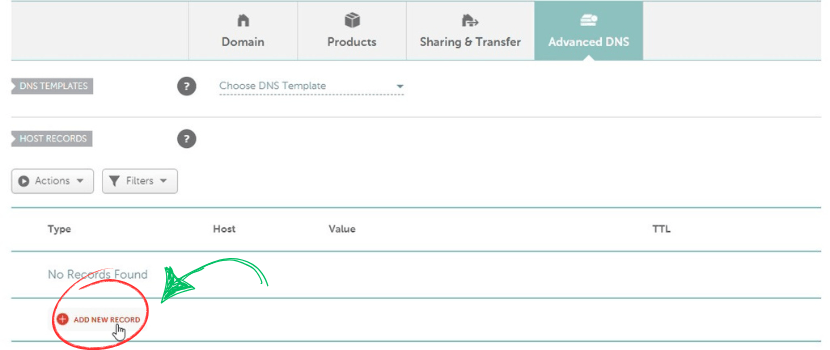
Step 4: Add your custom CNAME information provided by Systeme.io.
Action: Click "Add New Record."
Add New Record
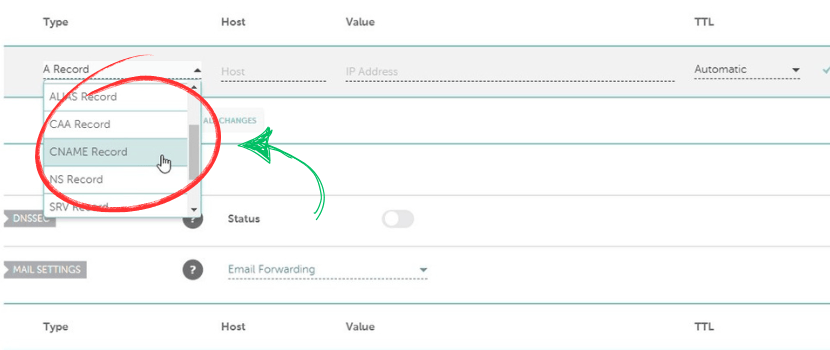
Next: Click to add a "CNAME Record."
Click to Add CNAME Record
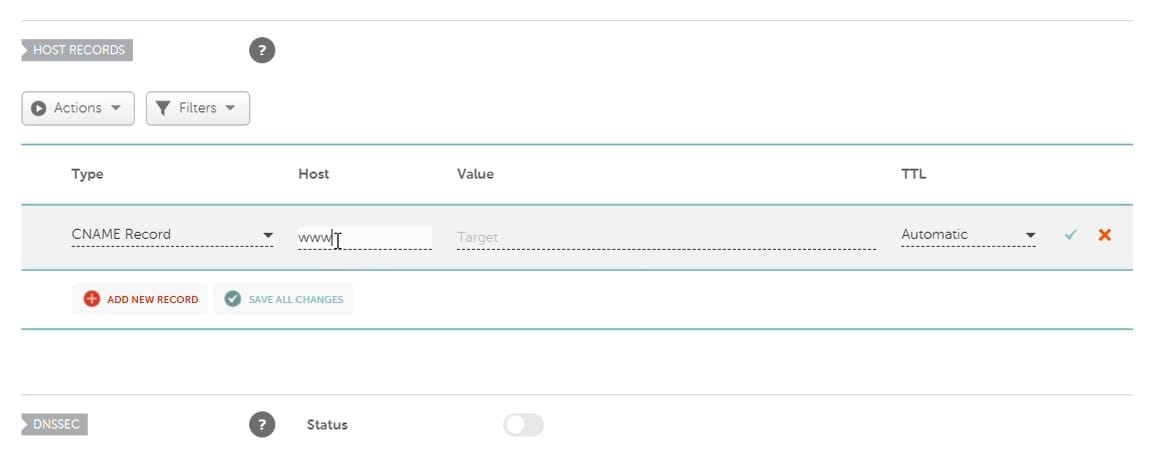
Then: Enter "www" in the Host section.
Add www in the Host Section
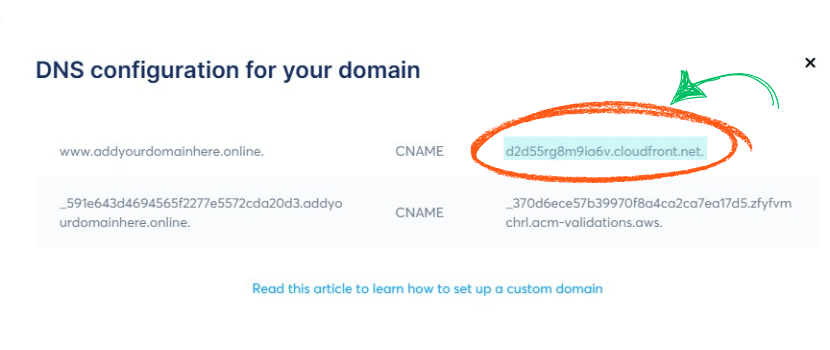
Now: Go back to your Systeme.io DNS configuration page and copy the first CNAME. Make sure to include everything, including the period at the end.
Copy the CNAME System Assigned to Your Domain
Now: Go to your domain registrar and paste the CNAME into the Value (Target) box.
Paste Your CNAME in the Value (Target) box
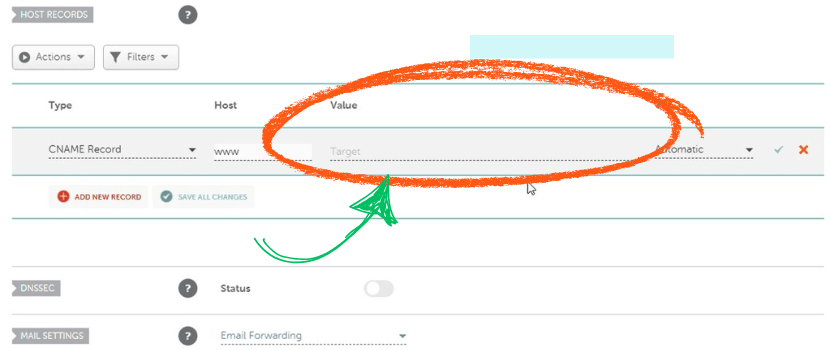
Then: Once completed, it should look like this.
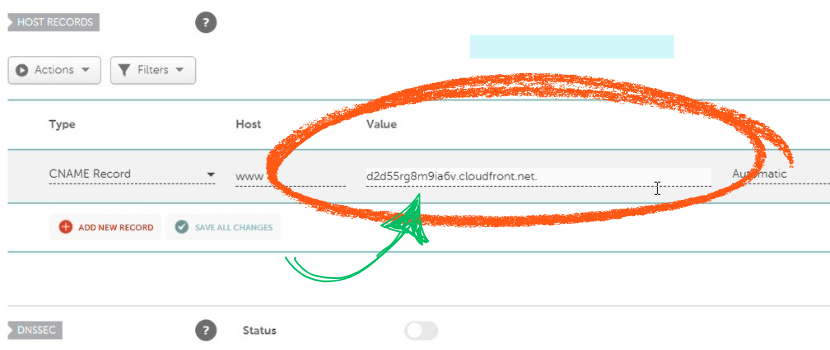
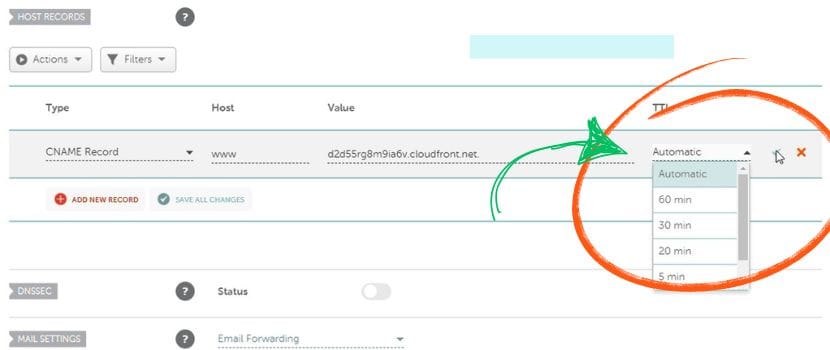
Now: Set your TTL to the lowest available setting. With Namecheap, you can set it to "Automatic," but your domain registrar might not offer that option. If not, set it to 60 minutes.
Set the TTL for This CNAME
Step 5: Add your second CNAME record.
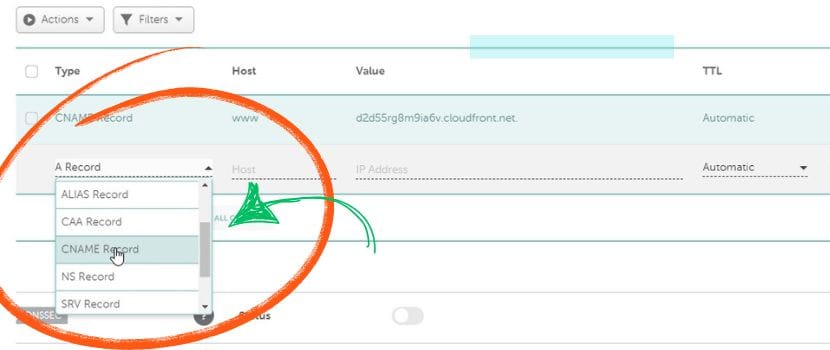
Action: Click "Add new record" and add a new CNAME Record.
Add New CNAME Record
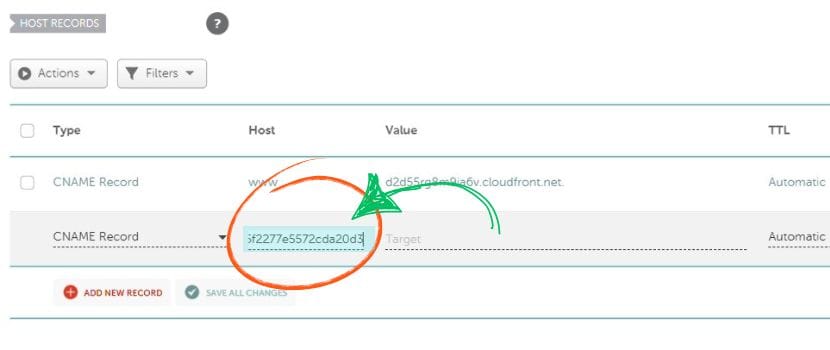
Action: Now copy everything before the period (do not include the period itself).
Copy Everything Before the Period
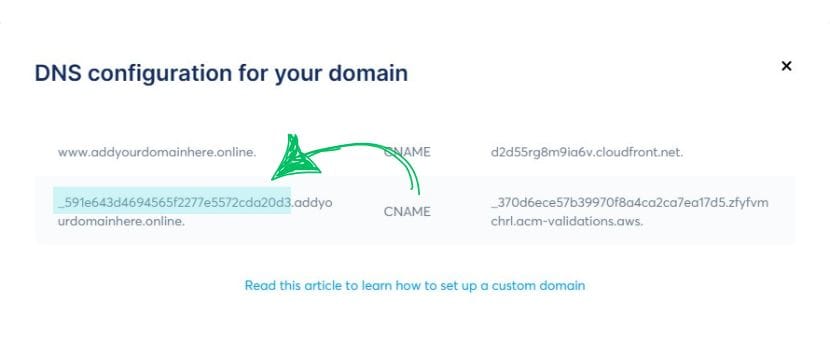
Then: Paste it into the Host box.
Paste it in the Host Box
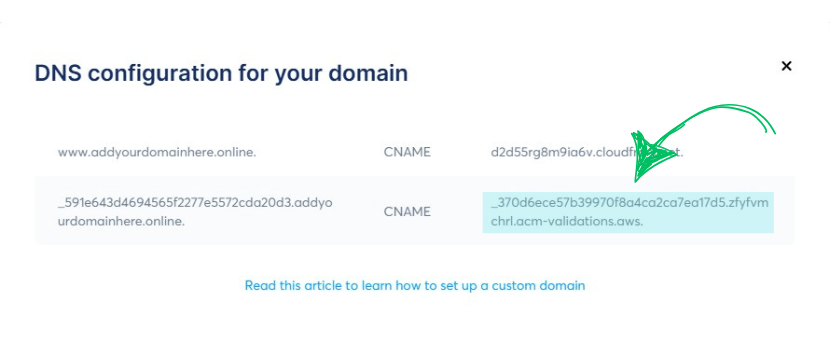
Now: Return to Systeme.io and copy everything, this time including the period.
Copy Everything Including the Period
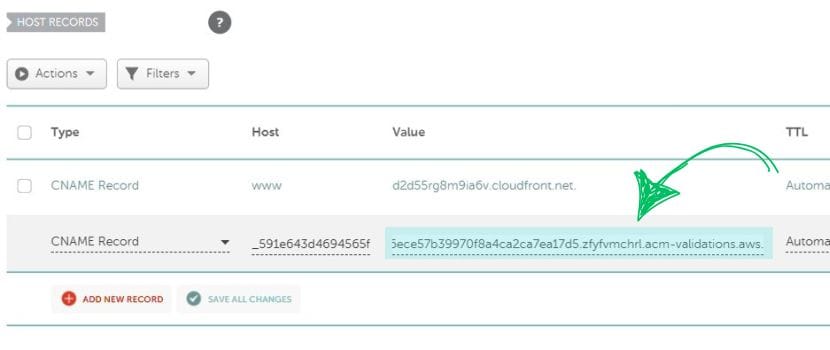
Then: Paste everything into the Value (Target) box.
Paste it in the Value (Target) box
Now: Set the TTL to the lowest available setting, which can be "Automatic" or 60 minutes.
Set the TTL for This CNAME
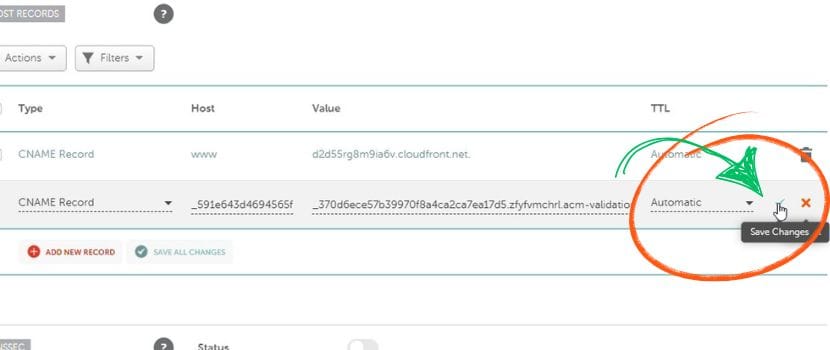
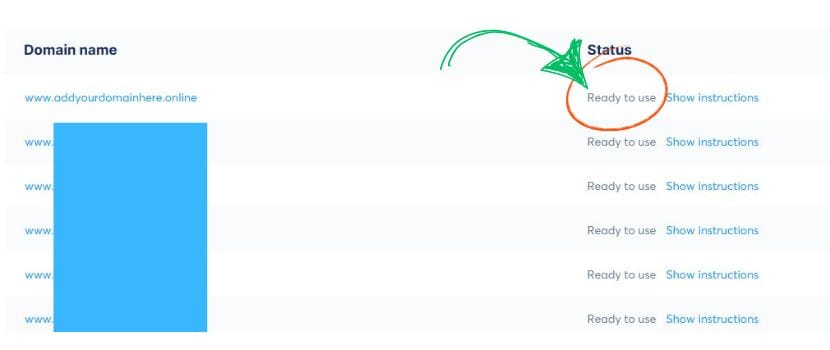
Now: You're done! It may take 24–48 hours for the changes to take effect. In my experience, it took only 10 minutes to 3 hours for my DNS to propagate. This timing varies by registrar, so yours might be different depending on your provider.
Wait for the DNS to propagate
Questions: If you have any questions, join our Systeme.io Facebook group and feel free to ask them there.

Alex Carr
Alex is an entrepreneur who has helped thousands bring their business ideas to life. With nearly two decades of experience in building and growing online ventures, Alex owns a thriving truck dispatch company and several successful online businesses. Driven by a passion for helping others, Alex creates practical tools and resources to guide entrepreneurs on their path to success.
ABOUT
SioHub.com simplifies Systeme.io with expert guides and resources to help you grow your online business.
Created with ©systeme.io


